EN

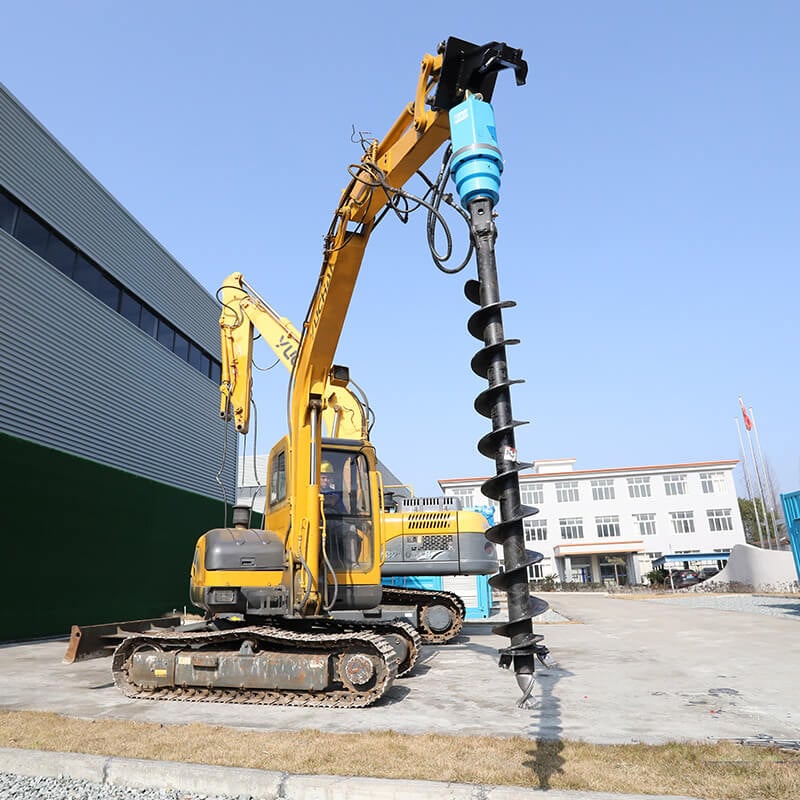
An excavator auger can make drilling operations more efficient, but successful work starts before the bit touches the ground. A pre-operation inspection helps identify visible damage, loose connections, hydraulic leaks, worn cutting components, and potential jobsite hazards before they interrupt the work.
Whether you are drilling holes for fence posts, landscaping, utility installation, or foundations, a consistent inspection routine helps operators prepare the equipment for the task and recognize problems that require attention.
This guide provides a practical checklist for inspecting an excavator auger before drilling, including the attachment, hydraulic system, excavator connection, work area, and initial operation.
If you are evaluating attachments for your next drilling project, explore our excavator auger solutions to learn more about the available equipment options.
1. Check the Job Requirements and Work Area
Before inspecting the attachment itself, confirm that the equipment and planned drilling method are suitable for the job.
Confirm the ground conditions
Identify the expected soil type and any known obstructions. Soft soil, compacted clay, gravel, and rocky ground can place different demands on the auger bit and drive system.
If the ground conditions differ significantly from those expected, pause and reassess the attachment configuration before continuing.
Identify underground utilities
Before drilling, establish the location of underground electrical cables, water pipes, gas lines, communication cables, and other buried services. Follow the applicable utility-location procedures and site-specific requirements.
Do not assume that an area is clear simply because no services are visible above ground. If the proposed hole conflicts with a marked service or the location remains uncertain, stop and resolve the issue before drilling.
Verify the planned hole dimensions
Confirm the required hole diameter, depth, and location against the project specifications. Check that the selected auger bit and extension equipment, if used, are appropriate for those requirements.
A pre-operation check should identify obvious mismatches before the machine begins work.
2. Inspect the Auger Bit and Cutting Components
The auger bit makes direct contact with the ground, so its condition deserves particular attention.
Check the cutting teeth
Inspect the teeth for excessive wear, missing components, cracks, looseness, or visible deformation. Check the pilot bit and cutting edges as well, where fitted.
Worn or damaged teeth may reduce cutting effectiveness and make drilling more difficult. The correct replacement components depend on the auger model and the material being drilled.
If teeth are missing, damaged, or insecure, follow the manufacturer's instructions before putting the attachment back into service.
Examine the flighting
The spiral flights move excavated material out of the hole. Look for bent sections, cracks, unusual deformation, or material buildup that could interfere with operation.
Damaged flighting can affect spoil removal and may indicate that the attachment has experienced abnormal loads or impact.
Remove accumulated material only after the equipment has been safely stopped and secured. Never reach into moving components or attempt to clear a blockage while the attachment is operating.
Check for signs of abnormal wear
Uneven wear, fresh impact marks, or repeated damage can indicate a mismatch between the tool and the ground conditions.
Record any recurring problems and discuss them with the equipment supplier or service technician. Replacing worn parts without investigating the cause may allow the same problem to return.
For more detailed guidance on routine servicing and extending equipment service life, read our excavator auger maintenance guide.
3. Inspect the Drive Unit and Attachment Connections
The drive unit transfers hydraulic power into rotational movement. Its condition and connection to the excavator are essential to reliable operation.
Examine the mounting interface
Check the mounting bracket, pins, retaining devices, bolts, and other connection components specified for the attachment.
Look for missing retainers, looseness, visible cracks, deformation, or other signs of damage. Confirm that the attachment is secured using the correct procedure for the mounting system.
Never operate an attachment with an uncertain or visibly compromised connection.
Check the drive unit
Look for visible damage, fluid leakage, loose hardware, or unusual signs of wear around the drive assembly.
Where the manufacturer's instructions require gearbox oil checks or lubrication, follow the specified procedure and use the recommended lubricant. Do not assume that every auger drive has the same lubrication requirements or service intervals.
If you notice abnormal noise during previous operation, unexplained leakage, or signs of overheating, have the cause assessed before returning the unit to service.
4. Inspect Hydraulic Hoses and Connections
Hydraulic problems can affect auger operation and create safety risks. Inspect the system before starting work.
Look for visible hose damage
Check accessible hoses and fittings for cuts, abrasion, cracks, kinks, damaged protective sleeves, and signs of leakage. Pay particular attention to areas that may rub against the excavator or attachment during movement.
Look for loose or damaged fittings and signs of contamination around hydraulic connections.
Never use your hands to search for a pressurized hydraulic leak. High-pressure fluid can penetrate the skin and requires urgent medical treatment. If a leak is suspected, stop the equipment, isolate the hydraulic system according to the manufacturer's procedure, and arrange a safe inspection.
Confirm hydraulic compatibility
Verify that the excavator's available hydraulic flow and pressure fall within the requirements of the selected auger drive.
Also check the hose arrangement, couplers, and return-line requirements where applicable. Incorrect connections or incompatible hydraulic specifications can lead to poor operation or equipment damage.
Use the specifications for the exact auger model and excavator configuration rather than relying on general figures from another machine.
5. Check the Excavator and Mounting Security
The attachment is only one part of the drilling system. The carrier machine must also be suitable for the work.
Before drilling, confirm the following:
-
The excavator is on stable ground and positioned appropriately for the operation.
-
The attachment is compatible with the machine's mounting interface and hydraulic system.
-
The operator can maintain the required visibility and control of the drilling area.
-
The machine is operated within its specified limits.
-
Any required guards, retaining devices, and safety features are installed and functional.
Check the machine manufacturer's instructions for the approved attachment configuration and operating limits.
If the attachment appears unusually heavy for the machine, the mounting arrangement is uncertain, or the machine cannot maintain a stable working position, do not proceed until compatibility has been confirmed.
6. Conduct a Controlled Pre-Start Check
After the visual inspection, prepare the equipment for operation according to the manufacturer's instructions.
Confirm that people are clear of the attachment and that the drilling area is controlled. Check that hydraulic hoses and other components will not become trapped or stretched as the boom and attachment move through their intended range.
Start and operate the equipment only according to the approved procedure. If the manufacturer calls for a functional test, conduct it in the designated safe area.
During the initial operation, pay attention to:
-
Unexpected noise or vibration.
-
Visible hydraulic leakage.
-
Unusual movement at the mounting interface.
-
Irregular rotation or other abnormal behaviour.
-
Signs that the attachment is not responding as expected.
Stop immediately if an abnormal condition appears. Do not continue drilling in an attempt to see whether the problem resolves itself.
Never approach, adjust, or clear the rotating auger while it is in motion. Stop the equipment and follow the required isolation procedure before investigating a problem.
7. Use a Repeatable Inspection Checklist
A written checklist helps operators carry out the same essential checks across different shifts and projects.
| Inspection area | What to check | Action if a problem is found |
|---|---|---|
| Work area | Underground services, ground conditions, hole location | Resolve hazards before drilling |
| Auger bit | Worn, missing, loose, or damaged teeth | Service or replace components as specified |
| Flighting | Cracks, deformation, material buildup | Clean safely or arrange repairs |
| Drive unit | Visible damage, leaks, unusual wear | Refer to the manufacturer's service procedure |
| Mounting interface | Pins, retainers, bolts, visible damage | Secure correctly or remove from service |
| Hydraulic system | Hoses, fittings, couplers, visible leaks | Isolate safely and arrange inspection |
| Excavator | Compatibility, stability, operating limits | Confirm the approved configuration |
| Functional check | Abnormal noise, vibration, leakage, movement | Stop and investigate before continuing |
Record significant defects, corrective actions, and recurring problems. Inspection records can help site supervisors identify patterns and plan maintenance based on the equipment's actual condition.
This checklist is a general starting point, not a replacement for the operator's manual, the manufacturer's maintenance schedule, or site-specific safety procedures.
Frequently Asked Questions
How often should an excavator auger be inspected?
Carry out the required pre-operation checks before use and inspect the equipment again if unusual behaviour, an impact, a blockage, or a change in operating conditions occurs. Follow the manufacturer's schedule for more detailed servicing and inspections.
What are the main signs of a worn auger bit?
Common warning signs include visibly worn or damaged teeth, missing cutting components, deformation, and reduced cutting effectiveness. Confirm replacement criteria against the manufacturer's guidance for the specific bit.
Can I use an auger if a hydraulic hose is leaking?
No. Stop the equipment and follow the required isolation procedure. Have the leak assessed and repaired by a qualified person before resuming operation. Never search for a pressurized leak with your hands.
What should I check before using an auger on rocky ground?
Confirm that the auger drive and bit are suitable for the expected ground conditions. Inspect the cutting components and mounting interface, verify hydraulic compatibility, and follow the manufacturer's operating instructions. If the ground contains unexpected obstructions or conditions outside the attachment's specified capabilities, reassess the setup before continuing.
Does a pre-operation inspection replace scheduled maintenance?
No. A pre-operation inspection focuses on visible condition and readiness for the next task. Scheduled maintenance covers the additional servicing, lubrication, component checks, and other procedures specified by the manufacturer.
Conclusion: Make Inspection Part of Every Drilling Job
Inspecting an excavator auger before drilling helps operators identify visible problems, verify equipment readiness, and address jobsite hazards before work begins.
Focus on the cutting teeth, flighting, drive unit, mounting connections, hydraulic system, excavator compatibility, and underground utility checks. If a component is damaged or the attachment's condition is uncertain, resolve the issue before proceeding.
If you are selecting an excavator auger for an upcoming project, YC Equipment can help you review the available attachment options and the specifications required for your machine and ground conditions.
Need help selecting an auger attachment for your excavator? Contact YC Equipment for product information and a quotation.
Table of Contents
- 1. Check the Job Requirements and Work Area
- 2. Inspect the Auger Bit and Cutting Components
- 3. Inspect the Drive Unit and Attachment Connections
- 4. Inspect Hydraulic Hoses and Connections
- 5. Check the Excavator and Mounting Security
- 6. Conduct a Controlled Pre-Start Check
- 7. Use a Repeatable Inspection Checklist
- Frequently Asked Questions
- Conclusion: Make Inspection Part of Every Drilling Job